Vinyl Flooring Installation Instructions
"Click" Flooring Instructions
(Scroll down for "glue-down" flooring instructions)
These installation guidelines apply to the Trident® product only. All instructions and recommendations should be followed for a satisfactory installation.
• The floor covering should be stored and installed in a climate controlled location with an average temperature between 65°and 85° or 18 to 29°C.• Acclimate material a minimum of 48 hours prior to installation in the room/location where the installation will take place.
• Do not store directly on concrete, allow for air circulation. Do not open the cartons but spread them out and protect comers from damage.
• Failure to follow these guidelines may result in an installation failure (i.e. flooring may expand or contract, resulting in gapping). Trident is an interior product and must be installed in a temperature–controlled environment, maintained between 65 and 85 degrees F or 18°一29°C. Please keep in mind a concrete floor can be up to ten degrees colder than the actual room temperature.
• Avoid exposure to direct sunlight for prolonged periods, doing so may result in discoloration and excessive temperatures can cause the flooring to expand and lift off of the subfloor. During peak sunlight hours, the use of the drapes or blinds is recommended.
• Regardless of new construction or remodeling projects, keep flooring stored in rooms that are not being worked in and only install product after all other trades have completed work that could damage the flooring.
• To minimize shade variation, mix and install planks from several cartons.• Inspect all planks for damage before installing. Claims will not be accepted for flooring that has been cut to size an″or installed.
• All subfloor patching must be done with a Portland Cement based leveling compound and allowed to dry completely prior to installing flooring.• Installation – This product can be installed on, above, or below grade.
• Trident® is water/moisture resistant and reliably secures the flooring panels on all four sides. However, excessive moisture in the subfloor could promote mold, mildew, and other moisture related issues like the trapping of moisture emissions under the flooring, which may contribute to an unhealthy indoor environment.
• Trident® does not warrant nor is responsible for damage to floor covering due to moisture related issues.
Tools: Tape Measure, Utility Knife, Tapping Block or Rubber mallet, Pull Bar, ¼ ” Spacers, T-Square, Safety Glasses, Broom or Vacuum and, if necessary, tools for subfloor repair.
SUBFLOOR INFORMATION
All subfloors must be clean, flat, dry and structurally sound. The correct preparation of the subfloor is a major part of a successful installation, roughness or unevenness of the subfloor may telegraph through the new floor covering, resulting in an unsightly surface and may cause excessive wear on high spots. Subfloor must be flat- 3/16” over 10 feet or 1/8″ over 6 feet.
CAUTION: Some types of nails, such as common steel nails, may cause discoloration of the vinyl floor covering. Recommendations for attaching underlayment panels are not included. Solvent based construction adhesives, are known to stain vinyl floor coverings. All responsibility for discoloration problems caused by the use of the above mentioned products is not the responsibility of Trident® but rests with the installer and the underlayment panel manufacturer.
A.Wood Subfloors
1. Do not install material over wood subfloors that lay directly on concrete or overdimensional lumber or plywood used over concrete.
2. Do not apply sheet plastic over wood subfloors.
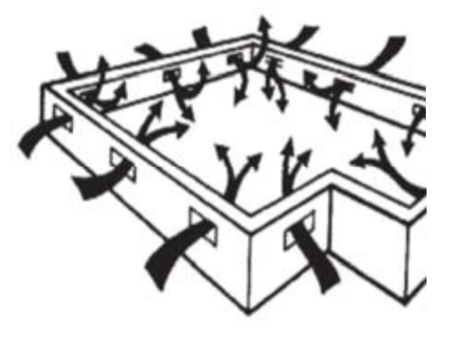
3. Basements and crawl spaces must be dry. Use of a6 mil black polyethylene is required to cover 100% of the crawl space earth. Crawl space clearance from ground to underside of joist is to be no less than l8” and perimeter vent spacing should be equal to 5% of the total square footage of the crawl space area to provide cross ventilation. Where necessary, local regulations prevail.
4. All other subfloors—Plywood, OSB, particleboard, chipboard, wafer board, etc. must be structurally sound and must be installed following their manufacturer’s recommendations. Local building codes may only establish minimum requirements of the flooring system and may not provide adequate rigidity and support for proper installation and performance.
5. Trident® resilient flooring is not recommended directly over fire-retardant treated plywood or preservative treated plywood. An additional layer of APA rated 1/4” thick underlayment should be installed.
B. Concrete Subfloors
1. New and existing concrete subfloors should meet the guidelines of the latest edition of ASTM (American Society for Testing and Materials). F710: “Standard Practice for Preparing Concrete Floors to Receive Resilient Flooring” available from the American Society for Testing and Materials, 100 Barr Harbor Drive, West Conshohocken, PA 19428, 610-832-9585, http://www.astm.org
2. Floors shall be smooth, permanently dry, clean, and free all foreign material such as dust, wax, solvents, paint, grease, oils, and old adhesive residue. The surface must be hard and dense and free from powder or flaking.
3. New concrete slabs must be dry. Maximum moisture level per CaCl test method is 8 lbs. per 1000 in 24 hr. Maximum level for ASTM2170 In-situ Relative humidity test method – 85%.
4. Do no install over concrete with a history of high moisture or hydrostatic conditions.
5. Maximum acceptable ph level of 9 or less.
6. The final responsibility for determining if the concrete is dry enough for installation of the flooring lies with the floor covering installer.
7. Holes, grooves, expansion joints and other depressions must be filled with a Portland based patching and leveling product, and troweled smooth and feathered even with the surrounding surface. Radiant Heat: Radiant heat components must have a minimum of 1/2” separation from the product. This is the only type of radiant heat system that is approved. Radiant heat system must be on and operational for at least 2 weeks prior to installation to reduce residual moisture within the concrete. Three days prior to installation lower the temperature to 65 degrees, after installation gradually increase the temperature in increments of 5° F to avoid overheating. Maximum operating temperature should never exceed 85°F. Use of an in-floor temperature sensor is recommended to avoid overheating.
Note About Existing Floors: WARNING! DO NOT SAND, DRY SWEEP, DRY SCRAPE, DRILL, SAW, BEAD BLAST OR MECHANICALLY CHIP OR PULVERIZEEXISTING RESILIENT FLOORING, BACKING, LINING OR ASPHALTIC “CUTBACK” ADHESIVES OR OTHER ADHESIVES.
When installing over existing floors: Existing floors may contain either asbestos fibers and/or crystalline silica. Avoid creating dust. Inhalation of such dust is a cancer and respiratory tract hazard. Smoking by individuals exposed to asbestos fibers greatly increases the risk of serious bodily harm. Unless positively certain that the product is a non-asbestos-containing material, you must presume it contains asbestos. Regulations may require that the material be tested to determine asbestos content and may govern the removal and disposal of material. see current edition of the Resilient Floor Covering Institute (RFCI) publication Recommended Work Practices for Removal of Resilient Floor coverings for detailed information and instructions on removing all resilient covering structures. For current information go towww.rfci.com.
C. Existing Floor Coverings
1. Trident® flooring can be installed over most existing hard surface floor coverings, provided that the existing floor surface is clean, flat dry and structurally sound.
2. Quarry tile, terrazzo and ceramic tile- Use caution with highly embossed tile. This type of tile plus grout joints should be filled with a high quality cement patching product.
3. Existing sheet vinyl floors should not be heavily cushioned and not exceed more than one layer in thickness. Soft underlayment and soft substrates will diminish the products inherent strength in resisting indentations.
4. Installation is NOT allowed over any type of carpet.
5. Never use solvents or citrus adhesive removers to remove old adhesive residue. Solvent residue left in and on the subfloor may affect the new look of covering.
INSTALLATION
Trident® plank flooring click system is designed to be installed utilizing the floating method only. Never secure the planks to the subfloor. Do not install cabinets or fixed objects on top of the flooring. Proper expansion space is required. Undercut all doorjambs. Do not fasten wall moldings and or transition strips to the planks.
1. Before you start with the installation, it is important to determine the layout of the flooring. Proper planning and layout will prevent having narrow plank widths at wall junctures or very short length pieces at the end of rows.
2. As with all plank products, install the planks parallel to the long exterior wall.
3. Determine if the starter row will need to be cut. If the first row of planks does not need to be trimmed in width, it will be necessary to cut off the unsupported tongue so that a clean, solid edge shows towards the wall.
4. Installation of the product must start from the left side of the room,working to the right when working in front of the planks or facing the starting wall. Use spacers along the walls to maintain proper expansion space(l/4”) and align the first plank.
5. Install the second plank in the row by aligning and dropping the end tongue over the end groove of the first plank. Apply light pressure to join the two planks together. Maintain an expansion gap of approximately 1/4″ from the wall. Repeat this process to complete the first row.
6. Start the second row by cutting a plank to the desired length. Keep in mind that the plank must not be shorter than 6″ (15cm) to achieve the best appearance.
7. Install the first plank in the second row by inserting the long side tongue into the groove of the plank in the first row. This is best done with a low angle of the plank. Maintain light pressure into the side seam as you rotate the plank to the subfloor. Repeat the process with additional planks to complete each row. Very little force is required to seat the tongue into the groove. You should feel the tongue lock into the groove.
8. It is critical to keep the first two rows straight and square, as they are the foundation” for the rest of the installation. Check for squareness and straightness often.
9. Continue installing planks and make sure to achieve a random appearance with end pieces of minimum 6″ (15cm). Check that all planks are fully engaged; if a slight gapping is found, the gap can be tapped together by using a tapping block and a scrap of flooring to cover the tapping block in order to avoid damages on the planks.
10. When fitting under door casings, if necessary, a flat pull bar may be used to assist in locking the planks.
11. When fitting around obstacles or into irregular spaces, planks can be cut easily and cleanly using a utility knife with a sharp blade. It is often beneficial to make a cardboard template of the area and transfer this pattern to the plank.
12. Protect all exposed edges of the flooring by installing wall molding an ″ or transition strips. Make sure that no plank will be secured in any way to the sub floor.
13. Protect the finished flooring from exposure to direct sunlight.
14. It is recommended to install expansion joints, for long runs over 15 meters (50 ft.)
What’s the Best Way to Clean Luxury Vinyl Flooring?
While LVT is perhaps the lowest maintenance flooring option, it is not a no-maintenance flooring option. Just make sure not to allow spills to linger. There is no need for high-speed buffing as with vinyl composite tile—luxury vinyl flooring typically requires basic cleaning methods like sweeping and mopping.
What kind of cleaning products should be used?
While there are simple best practices for keeping your vinyl floor clean, make sure to look for a neutral pH cleaner, as high acidity can strip the floor’s factory shine. Zep makes a few cleaners for Luxury Vinyl Flooring.
Trident Luxury Vinyl Dryback
Glue-down Installation Instructions
Trident Luxury Vinyl Dryback Glue-down Installation Instructions
It is important that flooring products acclimate by maintaining proper temperature before, during, and after installation in order to minimize dimensional changes. The subfloor, all flooring material, and the adhesive must be conditioned at a constant temperature between 65 ̊F (18 ̊C) and 85 ̊F (29 ̊C) for 48 hours prior to, during, and 48 hours after installation. Thereafter, maintain a room temperature between 55 ̊F (13 ̊C) and 100 ̊F (38 ̊C).
Radiant-heated substrates must not exceed a maximum surface temperature of 85°F (29°C).
Tools and materials
- Trident recommended LVT Adhesive
- Adhesive manufacturer’s instructions including proper trowel
- 100 pound, 3 section roller - (weighted floor roller)
- Chalk Line
- Carpenter square
- Utility Knife
- Cutting board
- Tape measure
- Moisture Meter or Calcium Chloride Test Kit
- Preparing the Area
- Remove all furniture, appliances, and fixtures from the room.
- Remove all binding strips or other restrictive molding from doorways,walls, etc.
- Undercut wood door casings where possible so that flooring can be slid under it
Asbestos Warning
WARNING! DO NOT MECHANICALLY CHIP OR PULVERIZE EXISTING RESILIENT FLOORING, BACKING, LINING FELT, ASPHALTIC “CUTBACK” ADHESIVES OR OTHER ADHESIVES. Previously installed resilient floor covering products and the asphaltic or cutback adhesives used to install them may contain either asbestos fibers and/or crystalline silica. The products in this carton DO NOT contain asbestos or crystalline silica. Avoid creating dust. Inhalation of asbestos or crystalline dust is a cancer and respiratory tract hazard. Smoking by individuals exposed to asbestos fibers greatly increases the risk of serious bodily harm. Unless positively certain that the previously installed product is a non‐asbestos containing material, you must presume it contains asbestos. Regulations may require that the material be tested to determine asbestos content and may govern the removal and disposal of material. See current edition of the Resilient Floor Covering Institute (RFCI) publication “Recommended Work Practices for Removal of Resilient Floor Coverings” for detailed information and instructions on removing all resilient covering structures.
Subfloor Preparation
• All subfloor surfaces must be flat, clean, dry, smooth, and free of movement.
• All surface imperfections should be filled and sanded with a Portland cement‐based latex patching compound.
• Completely remove all residual adhesives on previously covered concrete floors or cover them with a cementitious underlayment intended for this purpose.
• Never use solvent‐based adhesive removers.Flat – Within 3/16” in 10’ radius and or 1/8” in 6’ radius. Sand high areas or joints. Fill low areas with a high compressive strength Portland base compound.
Dry – Select the appropriate moisture indicator test specifically designed for use with wood or concrete subfloors. Test and record moisture content results.
DO NOT INSTALL FLOORING IF MOISTURE TEST RESULTS EXCEED RECOMMENDED LIMITS.
Concrete Subfloors
1. Concrete subfloors must be dry, smooth, and free from dust, solvent, paint, wax, grease, oil, asphalt sealing compounds or other materials. The surface must be hard and dense, and free from powder or flaking.
2. New concrete slabs must be thoroughly dry (at least six weeks) and completely cured. Curing agents, surface hardeners and other additives may cause adhesive bonding failure. These should be removed by sanding or grinding.
3. All concrete slabs must be checked for moisture before installing material. Moisture emissions from subfloor cannot exceed 3 lbs. per 1,000 sq. ft. per 24 hours as measured with the calcium chloride test or in excess of 75% In Situ Relative humidity. Responsibility for determining if the concrete is dry enough for installation of the flooring lies with the owner and installer.
4. Surface alkalinity of concrete substrate – Concrete slabs should be tested for the presence of alkali salt build up. Excessive alkali can cause adhesive and vinyl failure. A simple pH paper test using distilled water and pH paper can determine the presence of excessive alkali salt. Pour a small amount of distilled water on to the slab and allow it to stand for a minimum of one minute. Place the pH paper strip into the distilled water. The acceptable range should be from 5‐9. Corrective measures must be taken if the pH exceeds these guidelines.
Wood Subfloors
NOTE: As with many other interior finish products, modification of existing structural components may be required for a successful installation.
1. Nail or screw any areas that are loose or squeak. Wood panels should exhibit an adequate fastening pattern, glued/screwed or nailed as that system requires, using an acceptable nail pattern. Typical 6” along bearing edges and 12” along intermediate supports. Flatten edge swell as necessary. Replace any water‐damaged, swollen or delaminated subflooring or underlayment.
2. Wood subfloor panels should be a minimum of 1” or thicker and free of vertical deflection. All fasteners must be flush with the subfloor panels.
3. Basements and crawl spaces must be dry. Use of a 6 mil black polyethylene membrane is required to cover 100% of the crawl space earth. Crawl space clearance from ground to underside of joist should be no less than 18” and perimeter vent spacing should be equal to 1.5%of the total square footage of the crawl space area to provide cross ventilation.

Floor Layout
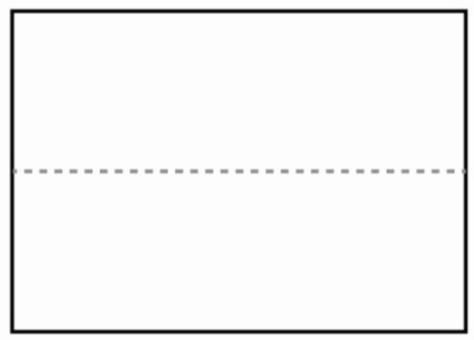
First determine the direction to install the planks. As a general rule, planks are normally installed running in the long direction of the main room. Place a mark in the center of the floor at each end of the room. Snap a chalk line between the marks.
Original Center Line

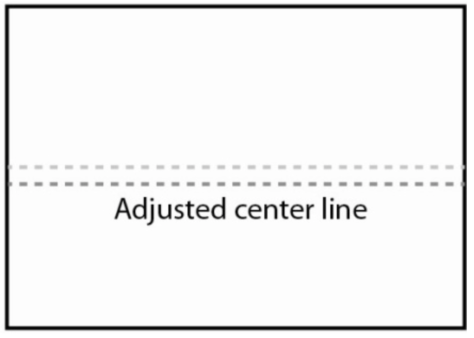
To avoid small narrow planks along the walls, divide the distance from the center line to the wall by the plank width (6”). If the remainder is less than 3 inches, adjust the center line one half width of a plank in either direction. This will provide a balanced layout with larger cut pieces at the wall.
Center line after adjustment

Finished Flooring Installation
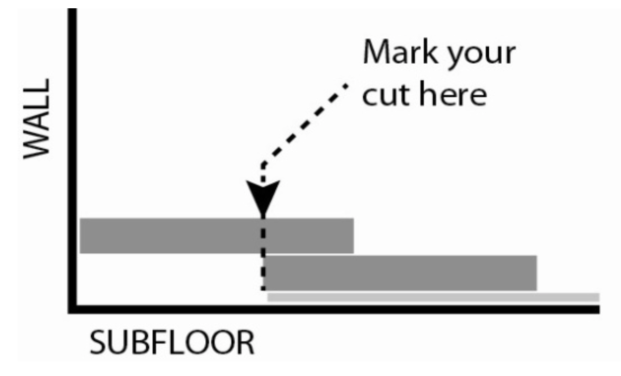
Using the recommended notched trowel spread the adhesive over one half of the floor up to the center line. Do not apply excessive adhesive. Allow the adhesive to dry to tack, which is normally 30 to 60 minutes, before installing the plank. Allow the adhesive to dry completely to tack prior to flooring installation.
Start installing the plank along the center line. Complete each row, including cut pieces at the wall, before proceeding to the next row. Offset end joints by at least 6 inches and position planks in a random fashion for the best appearance. Position each plank, lightly against the previous one, by pressing it firmly into place without sliding it. Remember to avoid small cuts of less than 6 inches at the ends of each row and place cut ends towards the wall.
Cutting a plank to fit
The last row of planks will need to be cut to fit to walls and other vertical surfaces.
Straight Cuts: place a loose plank directly over the top of the last full installed plank, making sure to line up all edges. Using a plank to measure the distance from the wall to the last installed plank, position the edge against the wall and mark the loose plank with a pencil where it meets the installed plank at the opposite edge from the wall.
Next, place the marked plank on a cutting board. Using a carpenter square as a guide, score the pencil line carefully with a sharp knife, then break/snap (or cut) the plank along the score mark.

CAUTION: Keep fingers away from the knife blade to avoid injury. Install plank with the cut edge toward the wall.
Irregular Cuts: Scribe plank to fit irregular shapes such as door trims, pipes, etc, and cut with a utility knife.
Immediately after Installation: Roll the entire floor with a 100 pound 3 section roller. Restrict to light traffic for the first 24 hours.
Replace the base moldings and return appliances and furniture to the room by rolling or sliding them over strips of hardboard. Seal all areas that may be exposed to surface spills (i.e. tubs, toilets, and showers) with silicone caulking.
Plank repairs
- Warm the plank with a heat gun
- Using a sharp utility knife, cut through a corner of the damaged plank taking care not to cut into the subfloor below.
- Lift the end of the plank and continue heating
- As sufficient heat is provided the plank will release from the adhesive
- Lift out the entire plank and warm the exposed adhesiveInstall the new plank
- Set the new plank firmly into place with a hand roller
- The repair is complete
Tips & Warnings:
- Sweep regularly, with a soft bristle broom.
- Use felt protectors under heavy pieces of furniture and chairs.
- Use protective mats at all exterior entrances. Do not use mats or area rug cushions constructed of rubber or PVC. Instead use urethane backed products.
- Spiked heels or shoes in need of repair can severely damage your floor.
- Replace hard plastic, metal casters or wheels on furniture with soft rubber casters or by using a protective mat under the casters.
- The sun’s UV rays can change the color of your floor.Keep animal nails trimmed.
- Protect your floor when using a dolly for moving furniture or appliances. Never slide or roll heavy furniture or appliances across the floor.
- Exterior walk off mats should be routinely maintained to avoid becoming a soil source.
Email • Telephone
Send Mail (info@tridentlvf.com)
Phone: 800-374-4795
Mailing Address
P.O. Box 1365
South Pasadena, CA 91031
Warehouse
2851 Las Hermanas
Rancho Dominguez, CA 90221
